Run your first IBM Streams application with Streams Studio
Edit meThis tutorial will show you how to compile and run an application using Streams Studio and get familiar with the environment.
In this tutorial, you’ll learn how to:
- Import a project into Streams Studio
- Compile the application
- Launch it as a standalone, or distributed application.
- View the data on a stream
- Download logs from a running application, which is called a job.
Prerequisites
You should have followed the steps to download and install the Streams Quick Start Edition (QSE).
Launch Streams Studio
Launching instructions depend on how you installed the Streams QSE. Following are instructions if you installed the Docker image or if you used a native installation of the QSE.
Docker QSE users
- Launch Streams Studio:
-
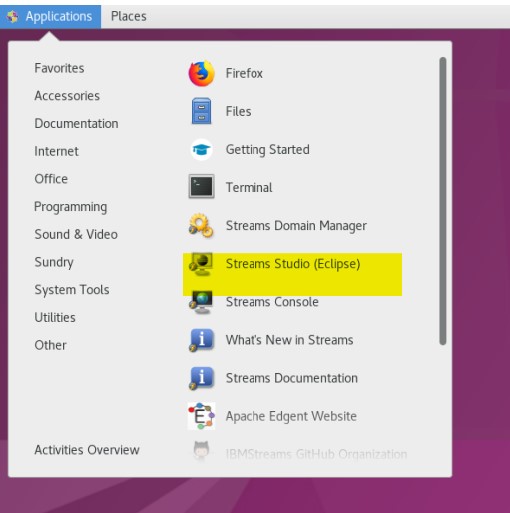
Click the Streams Studio by clicking Applications > Streams Studio from the desktop.
- Pick a workspace when prompted, such as
/home/streamsadmin/workspaces/quickstart.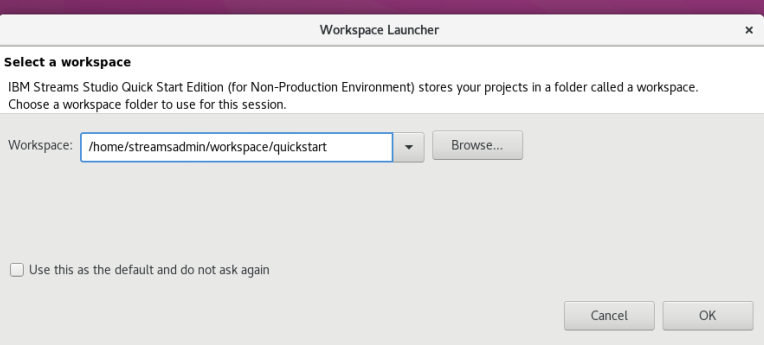
-
Click OK.
-
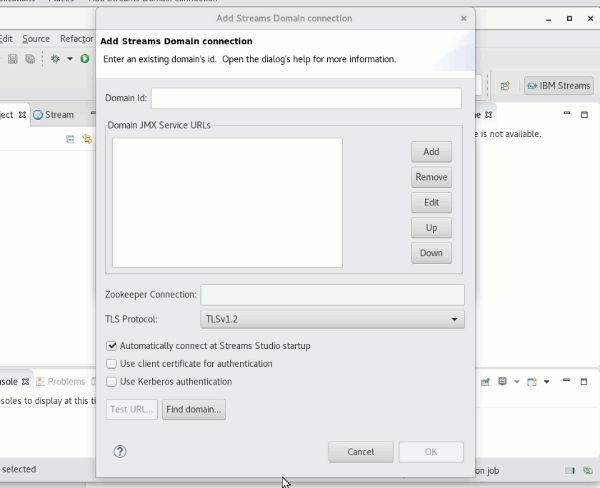
Streams Studio should open. Accept the default installation location in the Edit installation location dialog.
-
In the Add Streams Domain Connection dialog, click Find Domain and select the default domain, as shown in this diagram:
-
-
Afterwards, Streams Studio will open in the IBM Streams perspective, which is a collection of panes to make development easier.
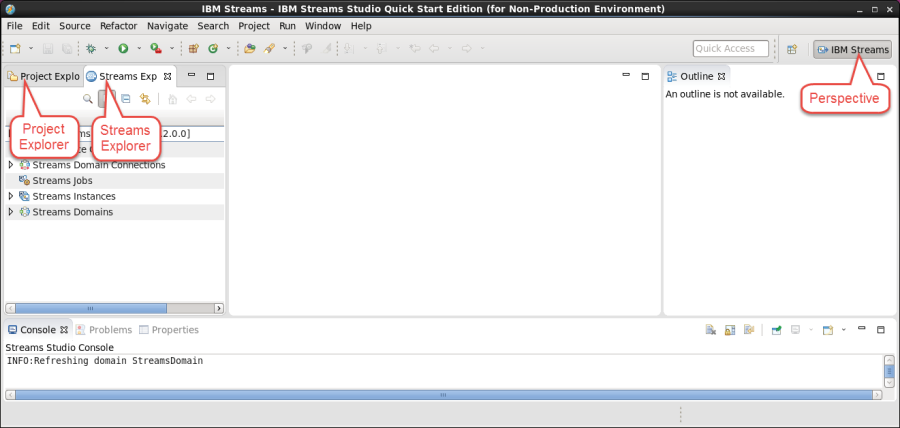
Project Explorer: Shows project contents and details.
Streams Explorer: Shows domain and instance information, including any jobs that are running.
Users with a Native Streams installation
- Follow the instructions in the documentation to install and launch Streams Studio
Import the sample application
The TradesApp sample application processes a stream of stock quotes for various companies, each identified by an id, or ticker.
It computes the rolling average price for each unique stock ticker and prints it to standard out.
-
From the QSE, open a browser and download the sample application project using this URL:
https://streams-github-samples.mybluemix.net/?get=QuickStart%2FTradesApp -
From Streams Studio, import the downloaded project:
- Click File > Import..
- In the dialog that appears, select General > Existing Projects into Workspace. Click Next.
- Make sure Select archive file is selected, then click Browse, and navigate to the location of the zip file you downloaded.
- Click Finish.
Compiling the application
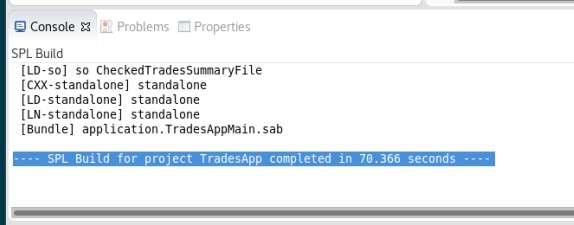
After the project is imported, it will compile automatically. This might take a few seconds. In the Console pane you should see a message like ---- SPL Build for project TradesApp completed in 70.366 seconds ----.
If you do not see the SPL Build message in the Console view as mentioned, here are the steps to compile the sample.
You need a build configuration to compile SPL applications in Streams Studio.
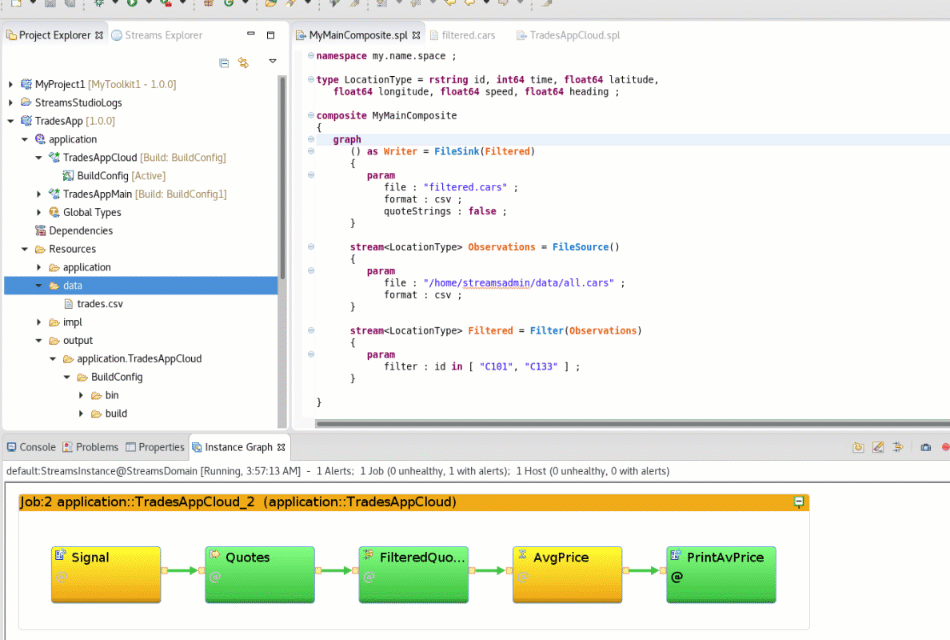
The TradesApp project should already have a build configuration, so in the Project Explorer, expand the TradesApp project and then expand the application node, and the TradesAppCloud node under it.
The TradesAppCloud node represents the main application we will be running.
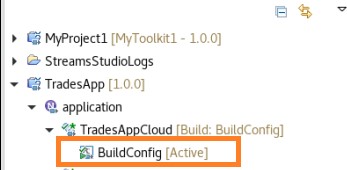
As shown in the preceding image there should be an item called BuildConfig in the project. This is the build configuration. If one does not exist, select the TradesAppCloud node, and choose New > Build Configuration. Accept the defaults, and click OK.
Select the build configuration and click Build from the context menu. The TradesAppCloud application should now compile.
Compiling will generate a few artifacts in the output folder. The most important of these is the Streams Application Bundle, (SAB) file. This is an executable file in the output/application.TradesAppCloud/BuildConfig folder with a .sab extension. Next we will launch the application.
Run the application
Now that the application is built, you can run it as a single process locally. This is called standalone mode.
Run the application in standalone mode
Running the application in standlone mode is useful for debugging and testing.
In the Project Explorer, expand the TradesApp project. Expand the application node, right-click TradesAppCloud. Select Launch > Launch Active Build Config as Standalone.
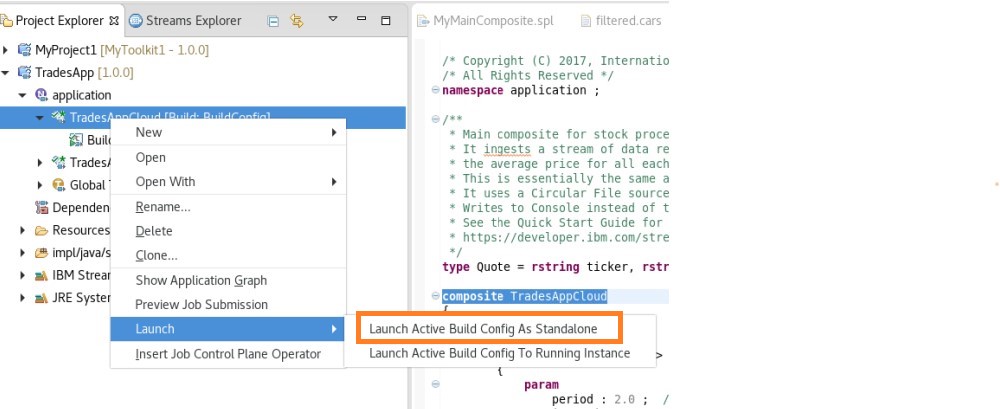
In the Edit Configuration dialog, click Launch.
Streams Studio will locate the SAB file and launch it for you.
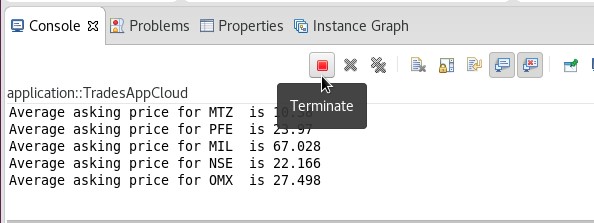
The application should start running and the Console view will show its output. You should see this:
Average asking price for NNN  is 20.8
Average asking price for PG  is 58.72
Average asking price for PNR  is 34.918
Each stock is represented by a ticker, e.g. PNR. Each line in the output reports the computed average price for the indicated stock.
Click the terminate button in the Console pane to stop the application.
Streams is a distributed platform, so although running the application standalone mode is useful for development, in production environments you’ll run applications in distributed mode.
In distributed mode, the application is spread across multiple processes and hosts.
- You can run in distributed mode:
Option 1: Run in distributed mode on a local Streams instance
Let’s try deploying the application in distributed mode.
In the Project Explorer, expand the TradesApp project. Expand the application node, right-click TradesAppCloud, and select Launch > Launch Active Build Config To Running Instance.
In the Edit Configuration dialog, click Apply, and then click Launch.
Streams Studio will send the executable SAB file to the Streams instance for execution.
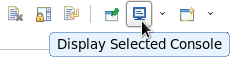
You can observe this in the Console view. Click the Display Selected Console button on the right to switch consoles to the Streams Studio Console.
You should see some output like: Submitted: StreamsInstance@StreamsDomain job id: 1 name: application::TradesAppCloud_1.
This shows that a job was submitted to the instance, because a running Streams application is called a job. Streams Studio includes tools to manage a running job, and we’ll use a handful of these in the next few sections.
View the running job in Streams Studio
Follow these steps to view the running job. You can observe its health, view the data it is processing and other performance metrics.
- Switch to the Streams Explorer, which is the second tab in the view on the left, behind the Project Explorer.
- Expand the StreamsInstances folder, and right-click the default@StreamsInstance instance and choose Show instance graph.
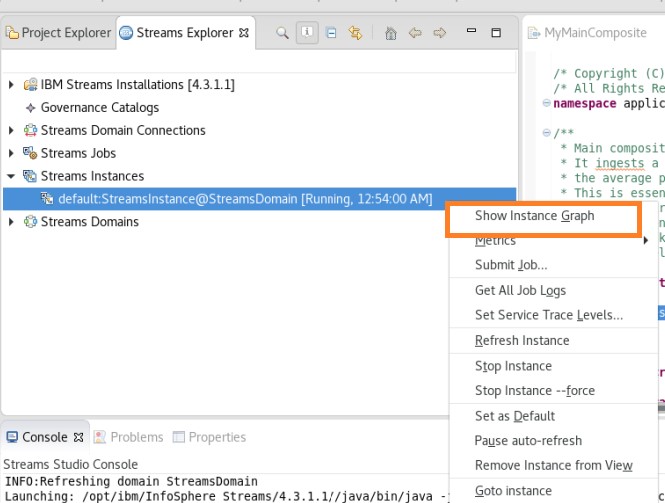
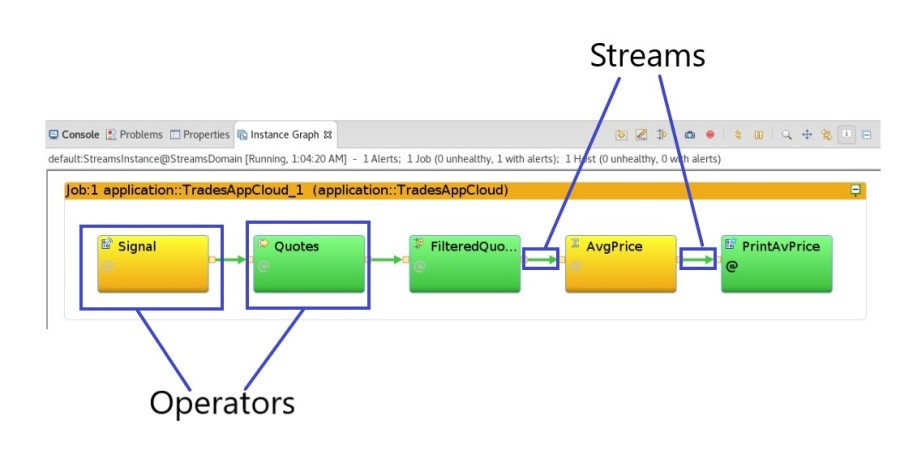
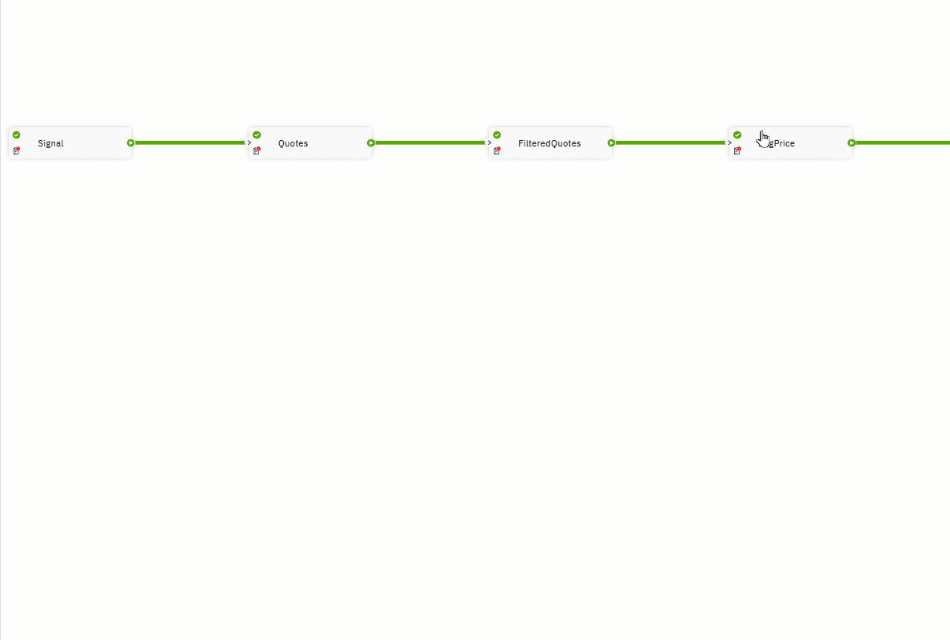
A new view called the Instance Graph should open. This view shows all the running jobs in the instance as graphs.
This is because Streams applications are really directed graphs that analyze data as it is processed. Each node in the graph is an operator that processes data, and each arrow represents a stream of live data. You can hover over an operator or a stream to view metrics. The color of each operator can be used to provide helpful information, but we won’t cover that here.
Observe the data flowing through the job in real time
You can look at the data on a stream to observe the data that is being processed or produced by an operator. For example, the Quotes operator
produces a stream of stock quotes. Let’s take a look at the data.
- Select the stream that comes out of the
Quotesoperator, right-click, and click - Show Data. - Accept the default attributes in dialog that appears and you should soon see a second view showing the tuples in the stream produced by the
Quotesoperator.
The following animation shows the sequence of steps.
View job logs
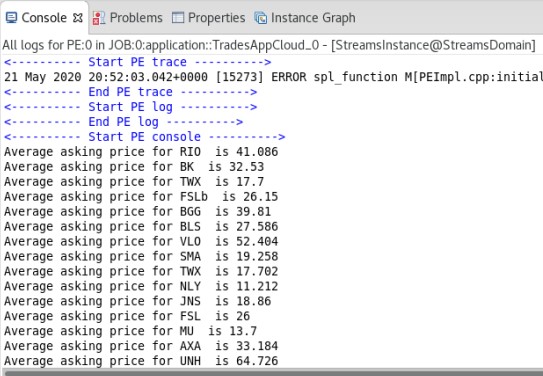
All application output, including messages printed to standard out, errors and trace data are sent to the logs. To view an operator’s logs, select the operator and click Show Log.
In this application, the output is generated by the PrintAvPrice operator.
To view the printed output, select the PrintAvPrice operator in the Instance Graph, right click it, and click Show Log > Show all PE Logs.
The logs for the operator will be retrieved and displayed.
Cancel the job
So far we have launched an application and examined it briefly. Now to cancel the job, go to the Streams Explorer view. Expand the Streams Jobs node, select the TradesAppCloud job you launched, and choose Cancel job from the context menu.
You’re done! Go to the summary section for next steps, or continue to learn how to submit the application on IBM C 1q loud Pak for Data.
Option 2: Run on a Streams instance in IBM Cloud Pak for Data
If you have a Streams instance in IBM Cloud Pak for Data (CPD) or in Kubernetes/OpenShift, the steps to launch the application are different.
As mentioned earlier, compiling the application creates an executable called a Streams Application Bundle (SAB) file. To run the application on CPD, you need to upload the executable file using the Streams Console.
These instructions assume that you have already provisioned an IBM Streams service instance in CPD.
Launch the application using the Streams Console
First, open the Streams Console by following the instructions for your version of CPD.
Cloud Pak for Data 2.0-3.0
- In the IBM Cloud Pak for Data web client, open the navigation menu and click on My instances.
- Click on the Provisioned instances tab.
- Find your Streams instance in the list. If your IBM Cloud Pak for Data version is 3.0+, click on the instance. Otherwise, open the context menu for the instance and click on View details. You will be brought to the instance details page.
- In the Endpoints section, find the property called External Console endpoint and click on the corresponding link.
Cloud Pak for Data 3.5+
- In the IBM Cloud Pak for Data web client, open the navigation menu and click on Services > Instances.
- Find your Streams instance in the list and click on it.
- In the Streams external endpoints section, find and click the link for Console.
Next, from the Streams Console, click Submit job:
- Browse to the location of the compiled application. This will be a
.sabfile in theoutputfolder of your project. - Click Submit.
- Set any parameters if prompted.
You should see a popup like this once submission is successful:
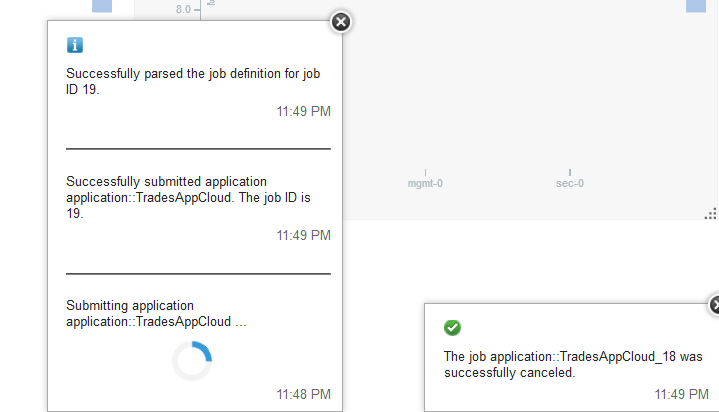
Notice that a running Streams application is called a job.
Keep these steps in mind for submitting applications for CPD when developing with Streams Studio.
View the running application in Cloud Pak for Data
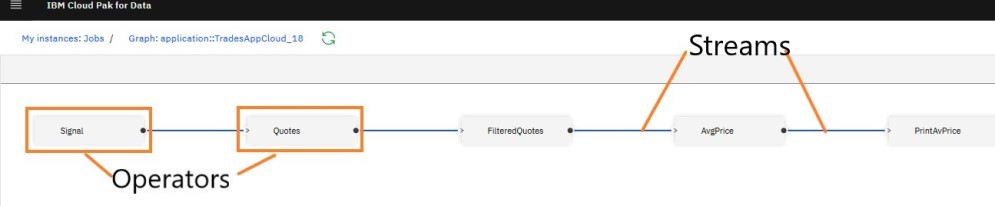
After launching the application in the Streams Console you can go to the Job Graph in CPD to view the running job.
To open the Job Graph, follow the instructions on this page.
Once you have the Job Graph open, you will see the application graph.
Streams applications are directed graphs that analyze data as it is processed. Each node in the graph is an operator that processes data, and each arrow represents a stream of live data.
Observe the data flowing through the job in real time
From the Job Graph, you can look at the data on a given stream to observe the data that is being processed or produced by an operator. For example, the Quotes operator produces a stream of stock quotes.
To view a sample of the streaming data: Select the stream that comes out of the Quotes operator, right-click and click View Data > Create new view.
A new pane will appear that shows the data in the stream produced by the Quotes operator. Notice that the view is updated as new data arrives.
View job logs
The application prints output to standard out. This output, errors and trace data are all sent to the logs.
To download an operator’s logs, follow the steps on this page.
More about Streams applications in Cloud Pak for Data
See the monitoring Streams applications with Cloud Pak for Data page for more information.
Option 3: Run on the Streaming Analytics service in IBM Cloud
As mentioned earlier, compiling the application creates an executable called a Streams Application Bundle (SAB) file. To run the application on CPD, you need to upload the executable file using the Streams Console.
Launch the application using the Streams Console
Open the Streams Console:
These instructions assume that you already have a running IBM Streaming Analytics service. If you need to create a service, start here.
- Navigate to the Resource list in IBM Cloud.
- In the Services section, find your Streaming Analytics service in the list and click on it. You will be brought to the service's details page.
- Click on the Launch button. This will open the Streams Console.
Launch the application
-
From the Streams Console, click Submit job:
- Browse to the location of the compiled application. This will be a
.sabfile in theoutputfolder of your project. - Click Submit.
- Set any parameters if prompted.
- Browse to the location of the compiled application. This will be a
-
You should see a popup like this once submission is successful:
Notice that a running Streams application is called a job.
View the running application in Streams Console
You may use the Streams Console to monitor the running job.
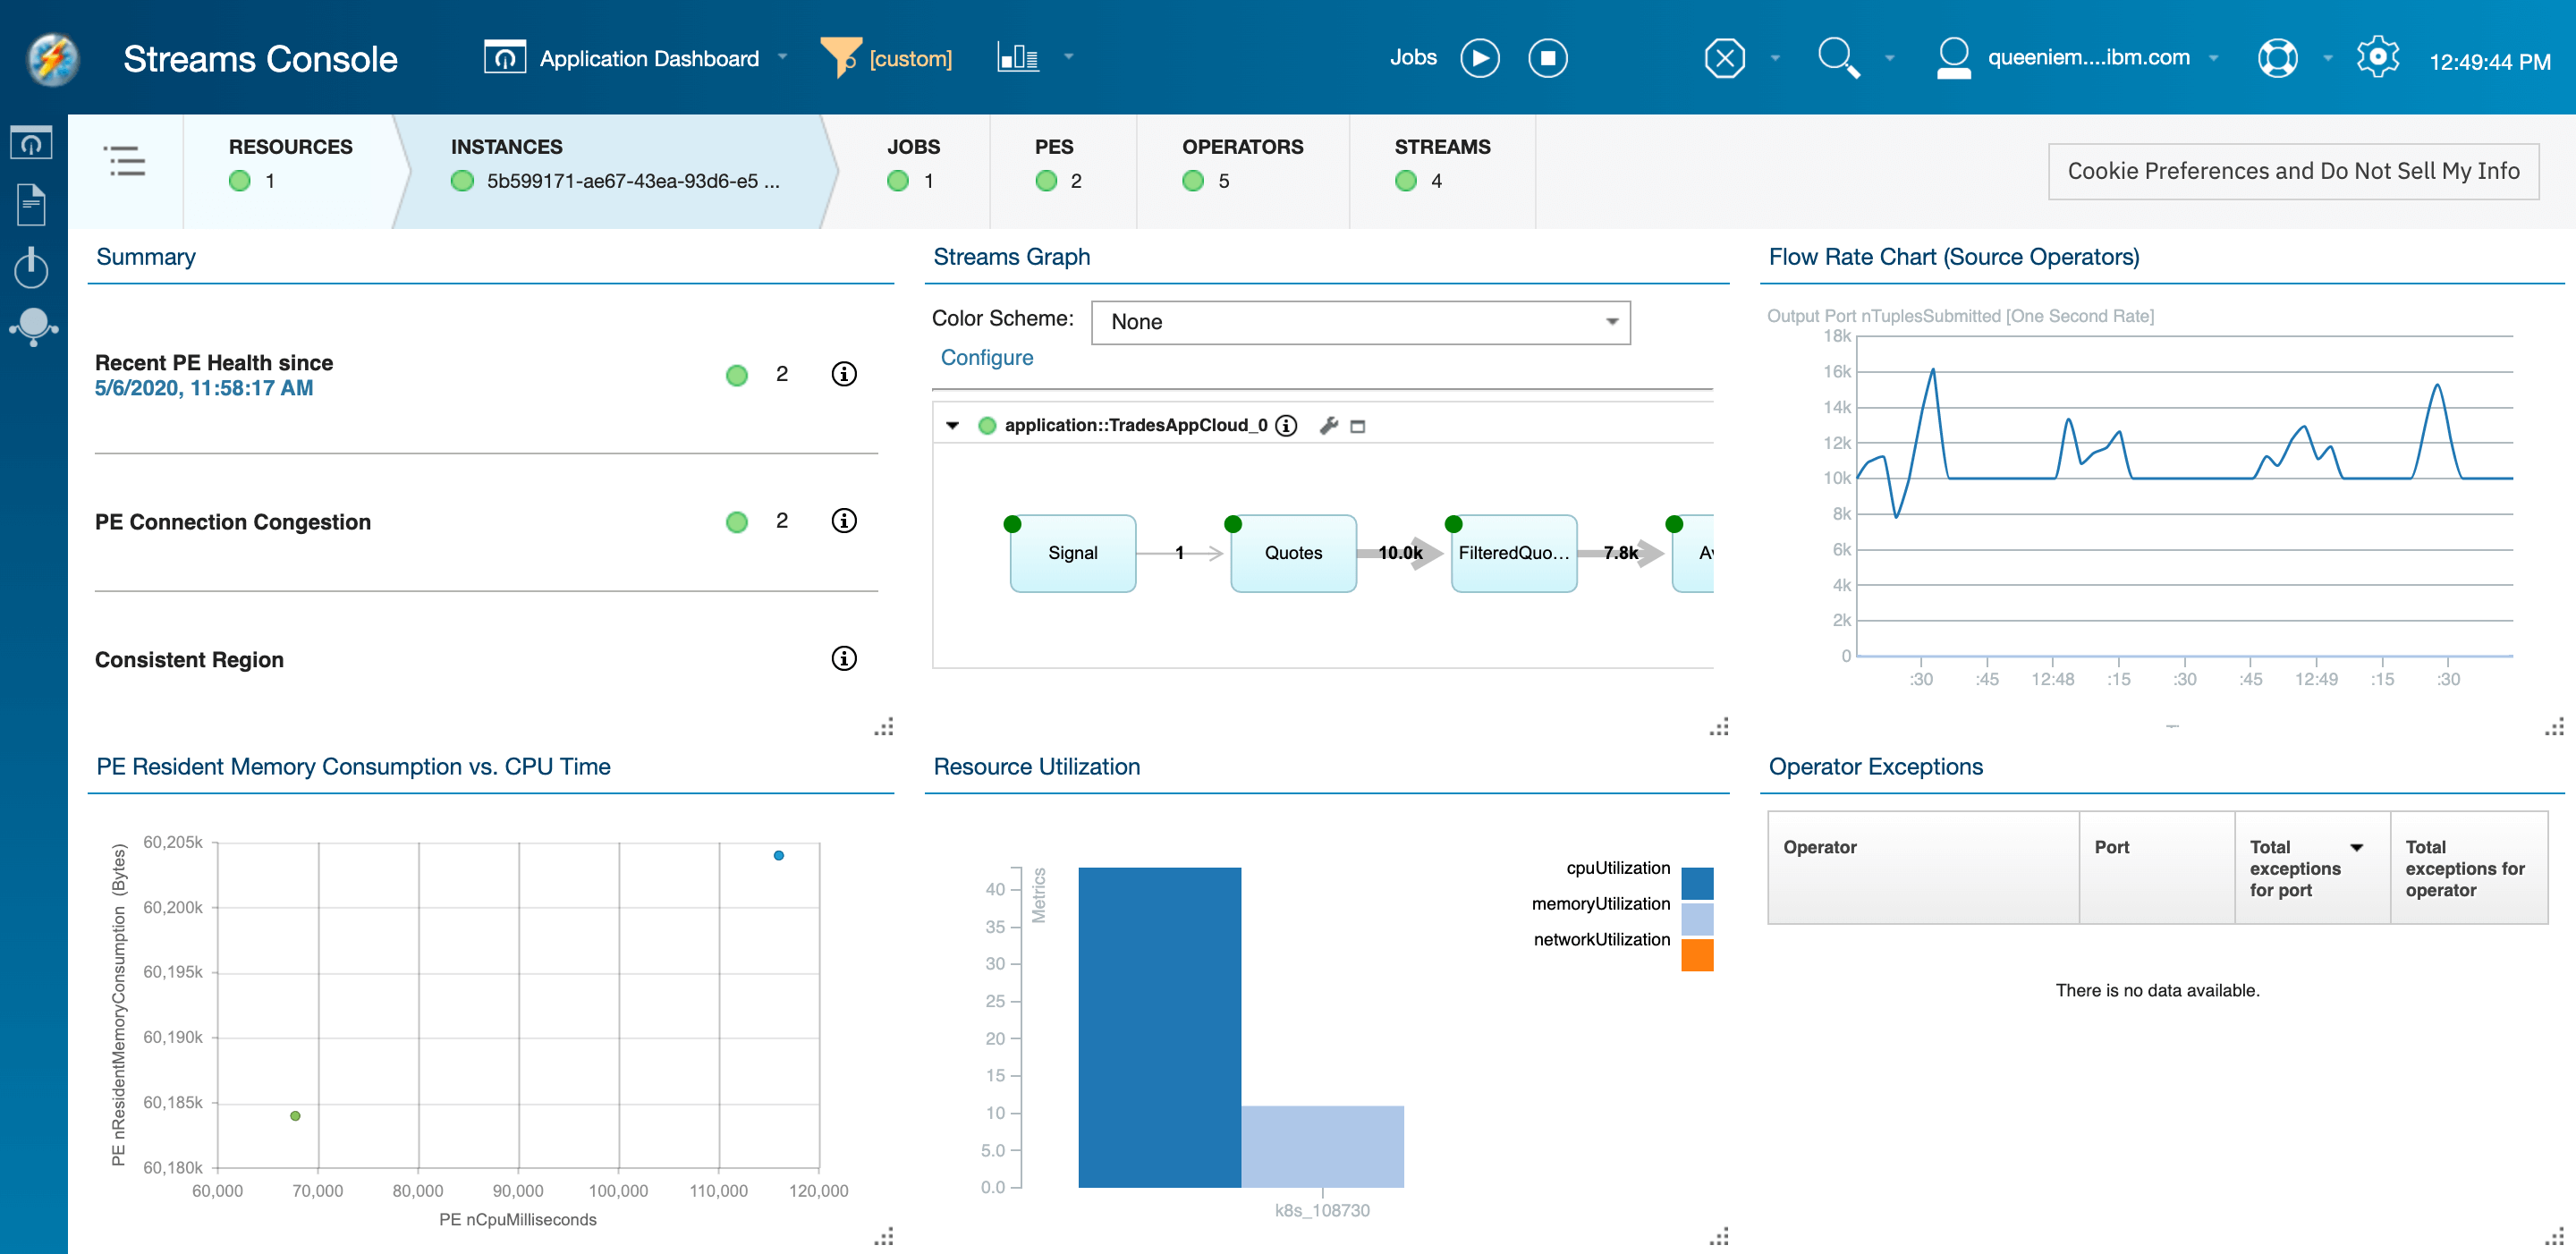
Streams Console overview
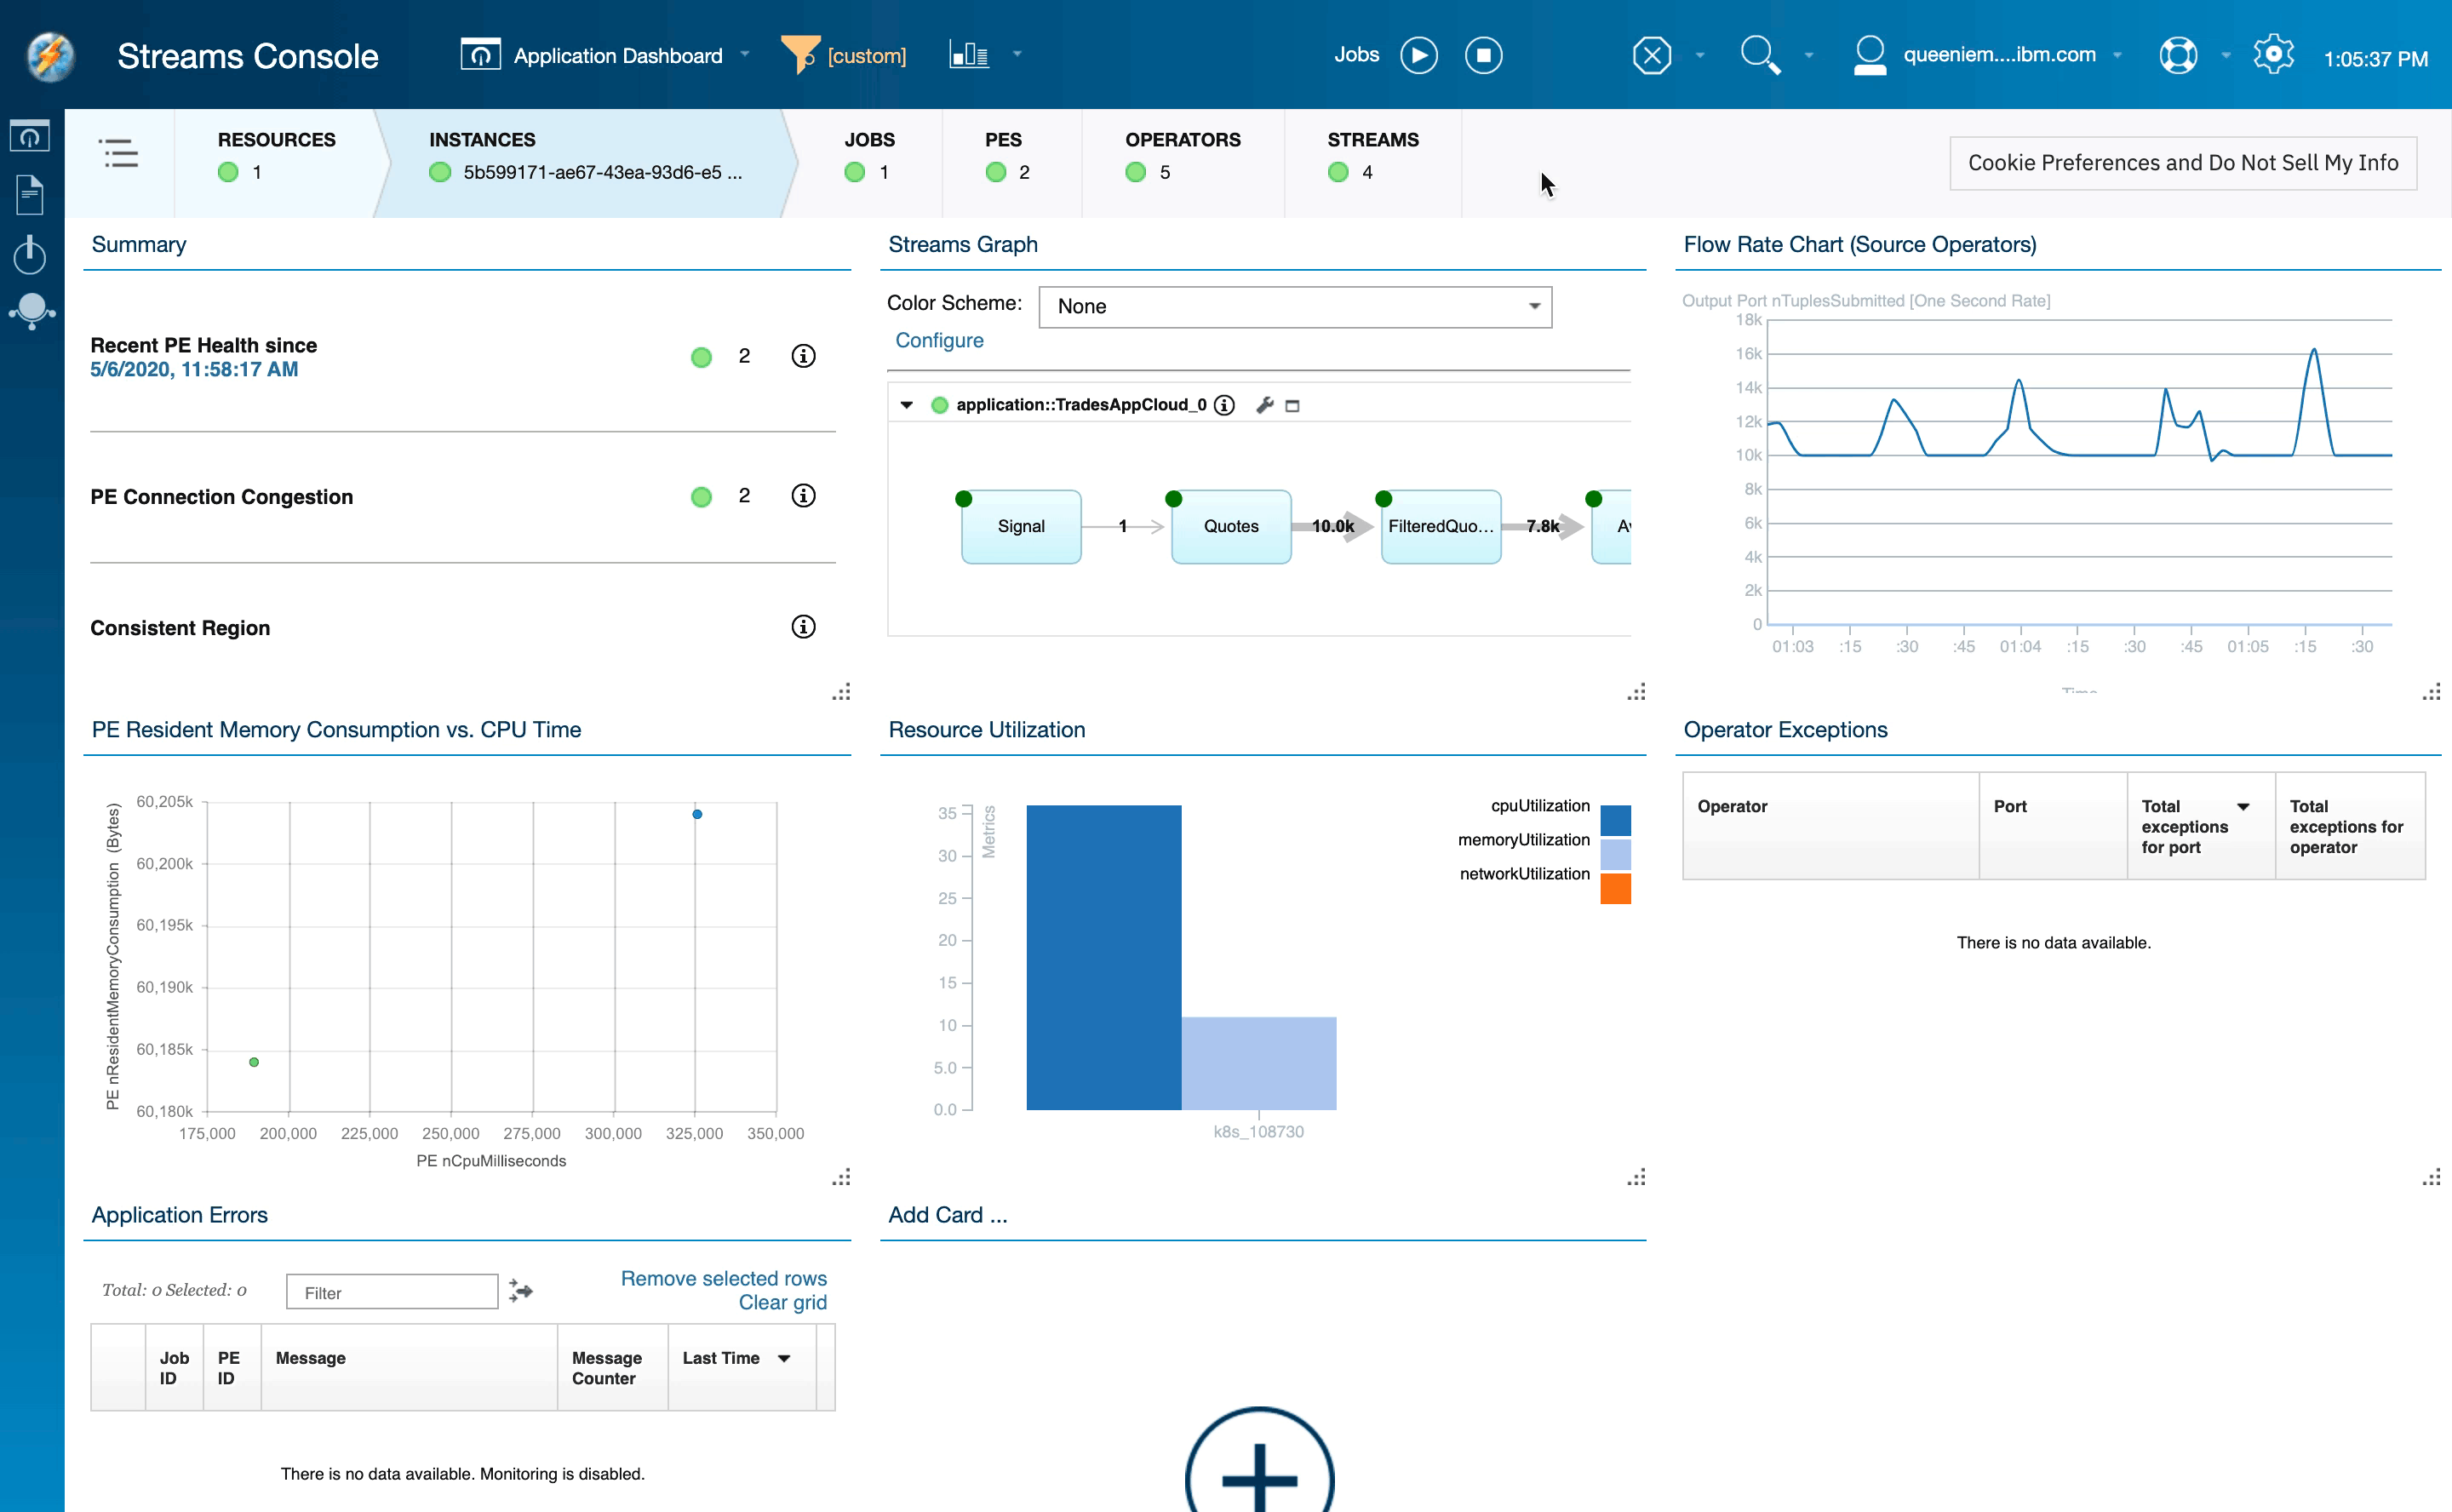
The Streams Console is an integrated console that runs in your browser. You can use it to manage your instance and resources, configure security, and monitor jobs from a single location. Its sleek and efficient interface lets you quickly gain insights into the health, metrics, issues, and performance of your Streams instance.
Launching the Streams Console
You may launch the Streams Console in one of the following ways.
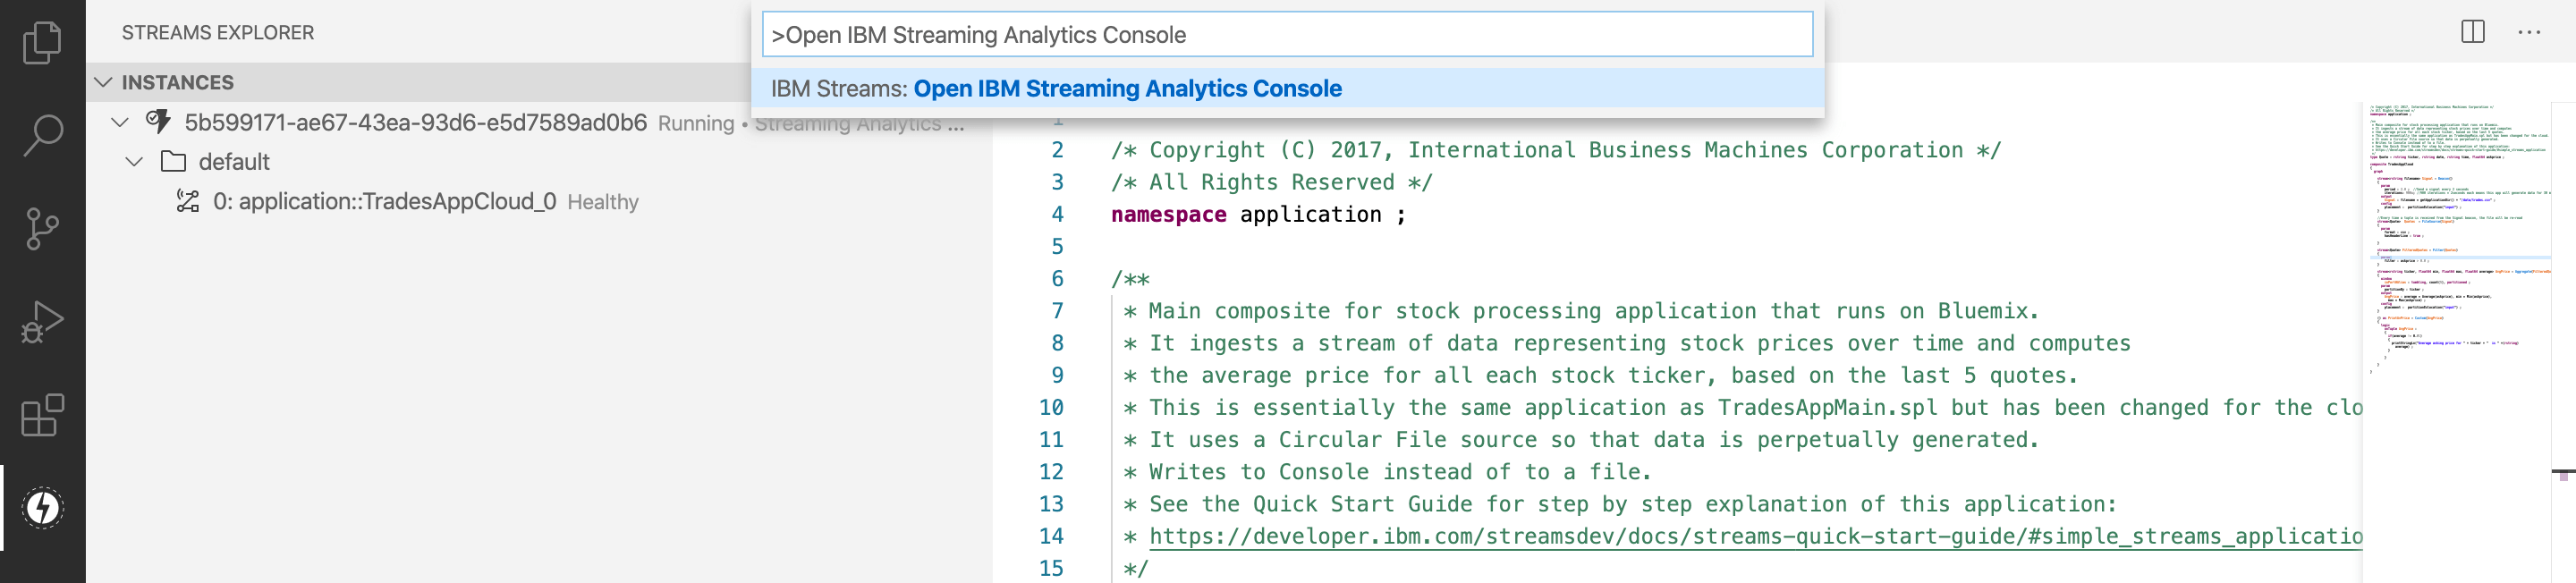
-
Execute the Open IBM Streaming Analytics Console command from the Command Palette. This will open the Streams Console in your browser.
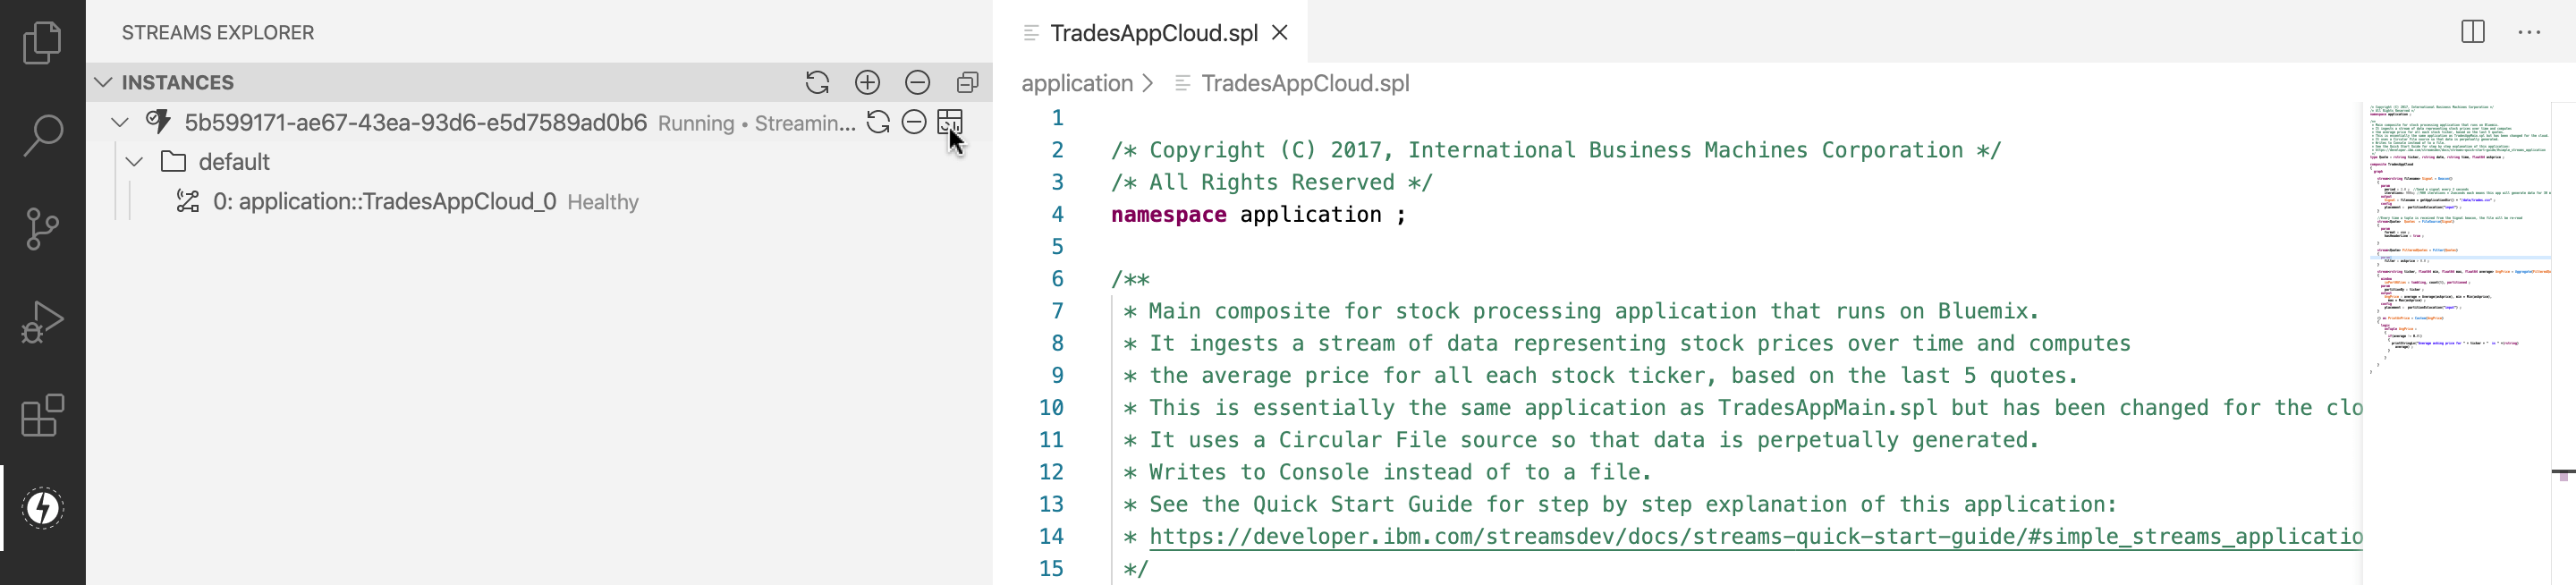
-
In the Streams Explorer view, hover over an instance node and then click on the Open IBM Streaming Analytics Console icon that appears on the right. This will open the Streams Console in your browser.
-
After you successfully submit an application, a notification will be displayed in the bottom right corner of VS Code. Click on the Open Streams Console button in the notification to open the Streams Console in your browser.

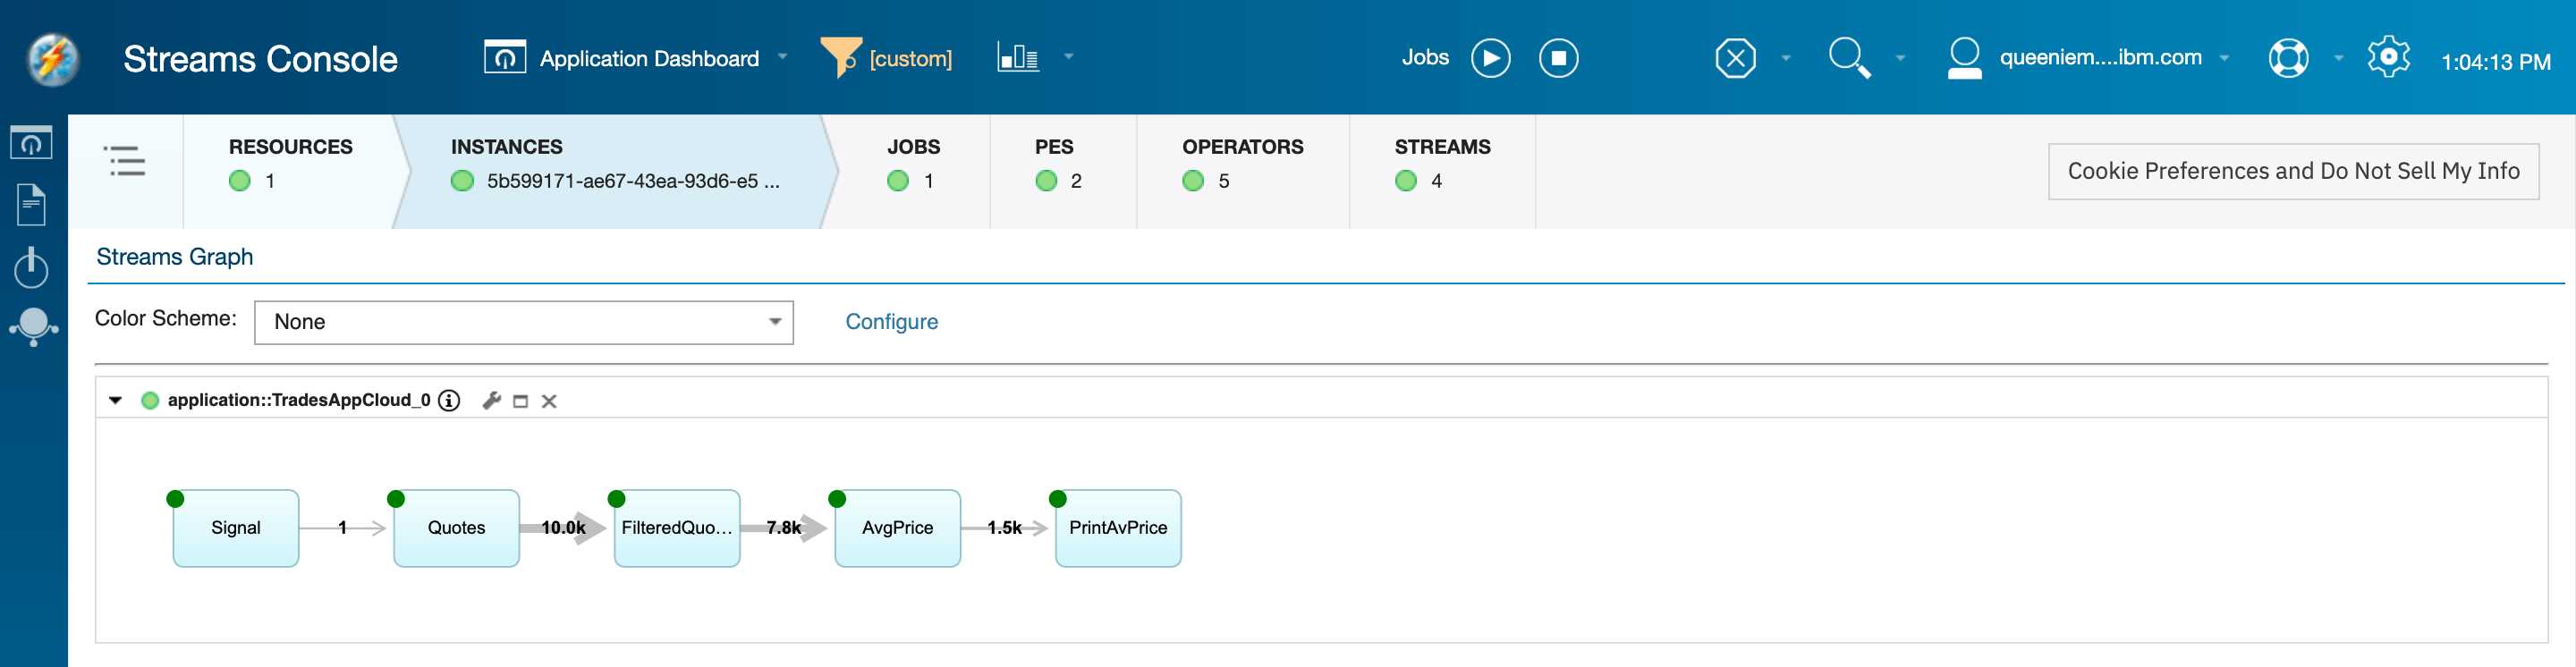
To view the graph for a job, expand the Streams Graph card.
Observe the data flowing through the job in real time
Quotes operator produces a stream of stock quotes. Let’s take a look at the data.
- In the Application Dashboard, find the Streams Graph card and expand it.
- Hover over the stream that comes out of the
Quotesoperator and right-click. - Select Create Dashboard View.
- Accept the default options and click on the OK button.
- Minimize the Streams Graph card.
- A new card is created in the dashboard that displays the tuples in the stream produced by the
Quotesoperator. Notice that the view is processed as new data arrives.
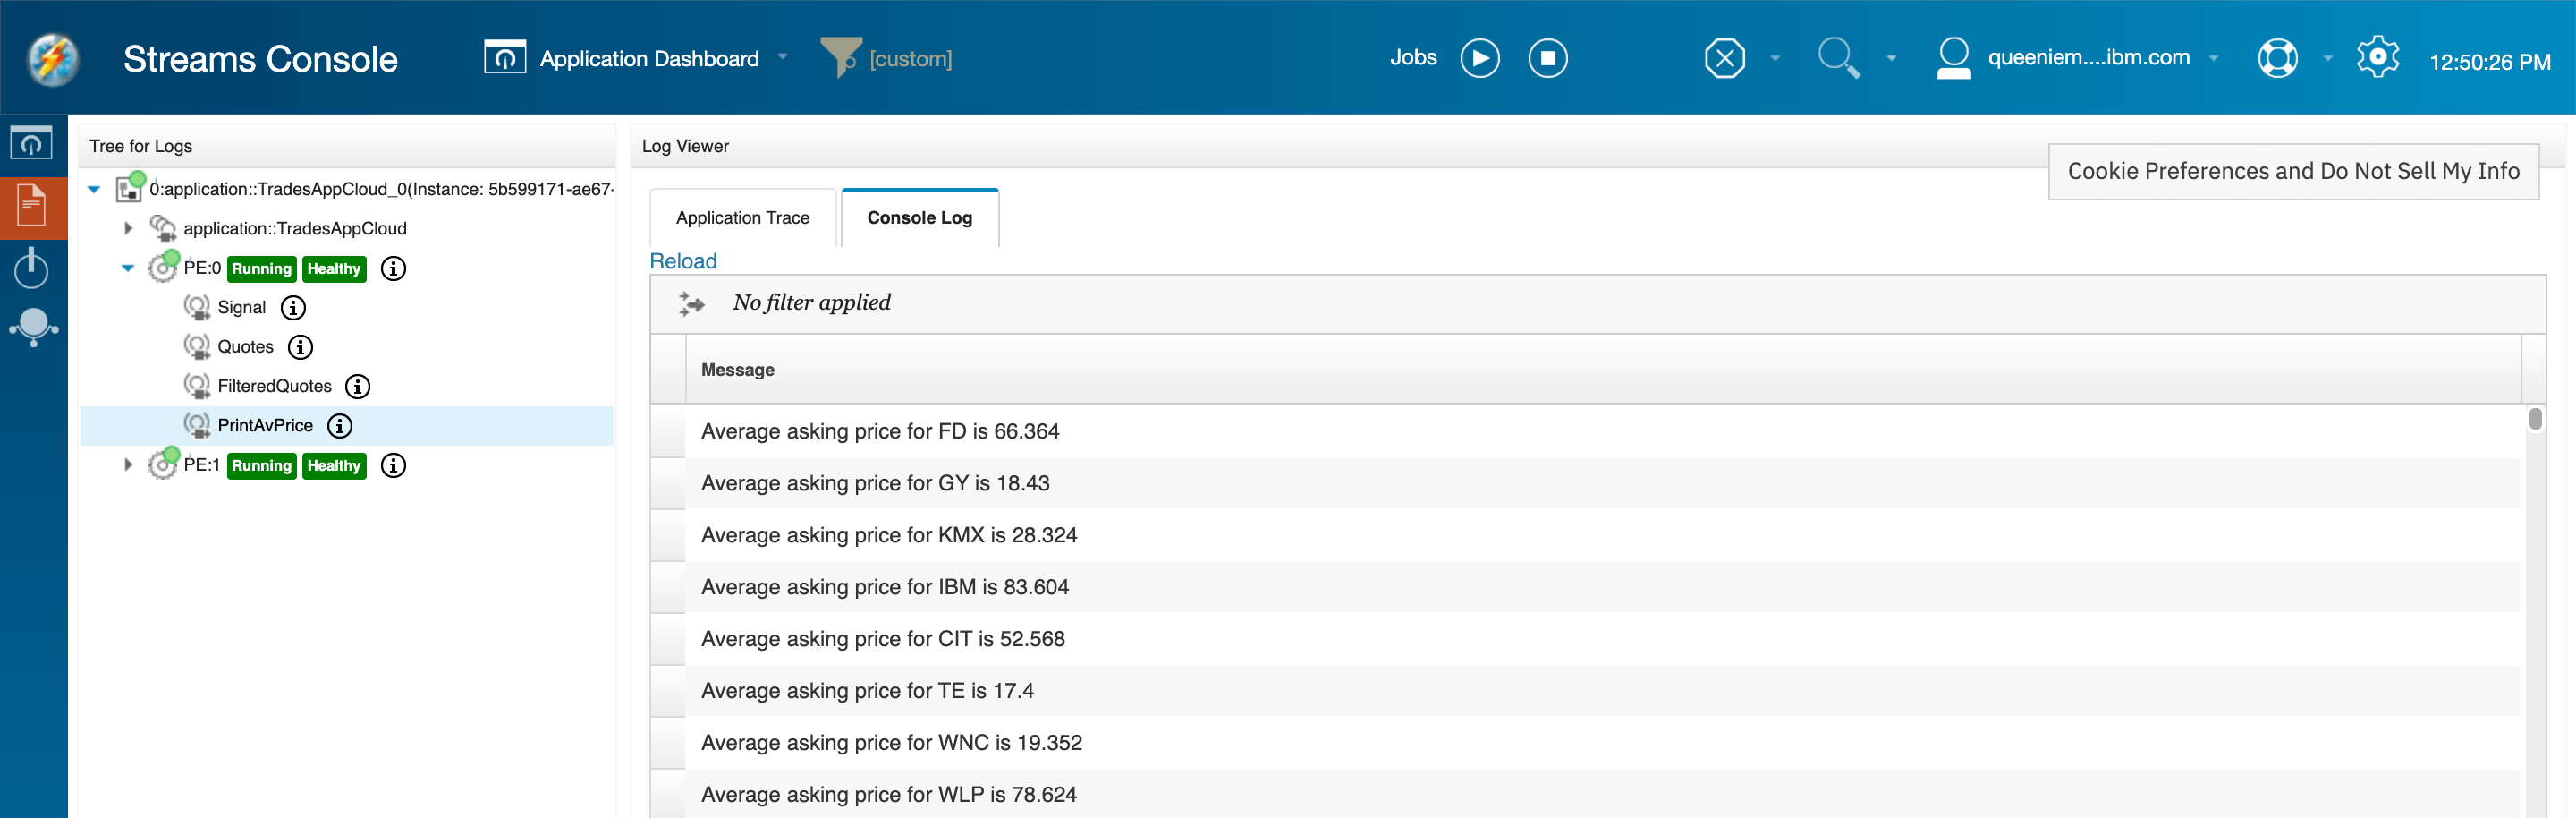
View application logs
All application output, including messages printed to standard out, errors, and trace data are sent to the logs.
- To view logs, click on the Log Viewer icon on the left side.
- Drill down to the object that you want to view the logs for.
- Choose one of the log types and the log data will be displayed.
- If you want to see the latest logs, click Reload.
Cancel the job
Once you have finished examining the job and looking at logs, cancel the job.
- In Streams Studio, click the job in the Streams Explorer and select Cancel job from the job’s context menu.
- In Cloud Pak for Data: from the job details page, select Cancel from the job run menu (CPD v.3.5+) or Delete (CPD v2.5+) from the job’s context menu.
- In IBM Cloud: From the Streams Console, click the Cancel job button at the top of the page. Select the job and click Cancel.
Summary
In this section, you learned how to:
- Import a project into Streams Studio
- Compile the application
- Create a new project and a new main composite
- Launch it as a standalone, or distributed application
- View the data on a stream
- Download logs from a running application, which is called a job
In the next section, you will learn Streams concepts and how to recreate this application.