Streams and Streams Studio Tutorial
Edit meThis is a series of tutorials where you’ll learn to use the components and features of IBM Streams and more specifically, Streams Studio.
You’ll build and enhance a simple application based on a connected-car automotive scenario in which you track vehicle locations and speeds (and other variables).
Although the underlying Streams Processing Language (SPL) code is always accessible, this tutorial requires no programming and does not describe the syntax and other features of SPL.
Learning Objectives
This tutorial shows you:
- The basics of stream computing, the fundamental concepts of IBM Streams, and the IBM Streams runtime environment
- How to use Streams Studio for creating and importing projects, submitting and canceling jobs, and viewing jobs, health, metrics, and data
- How to use the graphical editor to design and enhance a Streams application
- How to use the data visualization capabilities in the Streams Console
This tutorial has four parts that help you to learn the capabilities of IBM Streams:
Part 1
Build a simple IBM Streams application. Then, run it in the Streams runtime environment and inspect the results.
Part 2
Enhance the application by adding the ability to read multiple files from a given directory and slow down the flow so that you can watch things happen.
Part 3
Add an operator to your application to compute the average speed every five observations, separately for two cars. Use the Streams Console to visualize results.
Part 4
Use exported application streams to create a modular application. Bring in live vehicle location data. Show the live and simulated location data on a map.
Prerequisites
This tutorial is for software developers who have a working knowledge of:
- At least one or more programming languages, such as Java, Go, JavaScript, C#, Python, or Ruby.
- Common data structures such as string and integer.
- Database records and some SQL.
Required Software
(Optional) Install the Streams Quick Start Edition
You need an instance of IBM Streams to complete the tutorial.
If you do not have one, you can download the free Streams Quick Start Edition.
The instructions in this tutorial are based on the IBM Streams Quick Start Edition (QSE).
However, you aren't required to use the QSE Docker image. You can install and run the tutorial in any other environment with a current Streams installation.
If you don't use the QSE, some components might look different, depending on how closely your environment matches the QSE virtual machine setup described above.
Additionally, your environment might not have the launcher that is used to start the different tools used in these tutorial.
Choose one of the following options to install the IBM Streams Quick Start Edition:
- IBM Streams Quick Start Edition (QSE) Docker Image (Recommended)
- IBM Streams Quick Start Edition (QSE) native installation
The Quick Start Edition is available only in English.
Quick Start Edition information
After your installation is complete, your Streams ID for the Quick Start Edition is streamsadmin, and your
password is passw0rd. The root ID password is also passw0rd.
The following software is already installed on the Quick Start Edition image:
- CentOS Linux release 7.7 (64-bit)
- IBM Streams Quick Start Edition 4.3.1.1, including Streams Studio
| Parameter | Value |
|---|---|
| Host name | streamsqse (streamsqse.localdomain) |
| User and administrator ID | streamsadmin (logged in automatically) |
| User home directory | /home/streamsadmin |
| User password | passw0rd (password with a zero for the O) |
| root password | passw0rd |
| Streams domain | StreamsDomain (started automatically) |
| Streams instance | StreamsInstance (started automatically) |
In the Quick Start Edition, a domain (StreamsDomain) and instance (StreamsInstance) are already created and automatically started. This means that everything you need to run and test your applications is already prepared for you.
A domain is a logical grouping of resources in a network for the purpose of common management and administration. The domain is managed by a small number of Linux services (daemons) for tasks such as authentication and authorization, auditing, and supporting the Streams Console.
A domain can contain one or more Streams instances that share the domain's security model. An instance provides the runtime environment where you can submit applications to. It consists of a small number of additional services, for example, a resource manager, an application manager, and a scheduler.
This tutorial does not explore the creation and administration of domains and instances. See the documentation for your Streams version for more information.
Performance notes
- By default, the Quick Start Edition image is configured to have four processor cores and 8GB of memory. Depending on your system resources and the applications that you develop and deploy, you might be able to improve performance by allocating more processor cores and memory to the image. You can adjust the processor and memory configuration by updating your settings. For example, to update these settings for Docker, click Settings > Resources.
Install the tutorial projects
Next, you need to install the tutorial package that contains the needed projects, data files, and toolkits.
To encourage experimentation and exploration, the tutorial package includes prebuilt projects that include the final working version of each part. Therefore, you can experiment and get yourself in trouble any way that you like in any section and still go on to the next section simply by importing one of the provided projects.
You must have Internet access from the system where Streams is installed.
To install the tutorial package on the QSE:
- From your VM, download the tutorial ZIP file (GitHub). Then, extract the files.
- Extract the files to
streamsadminhome folder. - Open a terminal to the folder where the IntroLab_Install.sh shell script from the package is saved.
- Execute the script: ` ./IntroLab_Install.sh`
Detailed progress messages are written to the IntroLab_Install.log
file (in the same folder).
The installation will take about five minutes, depending on the speed of your Internet connection. The installation program builds a required toolkit, which involves downloading additional components. - When the installation is complete, press any key to terminate the
script and close the terminal.
The script removes itself and the installation files archive, so after successful completion you have only the downloaded file, the installation log, and an uninstall script in your home folder (in addition to any files already there before you started).
The uninstall script, IntroLab_Uninstall.sh, removes all installed files related to this tutorial, including toolkits, data, and desktop launchers. It does not remove any work you might have done in projects in your own Streams Studio workspace. Use this script if you want to clean up your environment later.
If the installation fails
If installation was not successful, check the installation log. After failure, the script cleans removes any files and directories it already installed.
If you are not using the QSE and do not have Apache Ant (1.8 or later) or Apache Maven (3.2 or later) installed in your environment, the installation will fail. These two utilities are required to build the Internet Toolkit, which is used in the final tutorial. Explaining exactly how to install these utilities is beyond the scope of this document. Other causes of failure might be that files cannot be written into subdirectories due to such as permission problems, pre-existing files, and insufficient disk space.
Troubleshooting other failures
If the progress messages and log file don't help you to figure out the
problem and you are an experienced Linux user, use a Terminal window to
run the installation script from the command line. Before running the
script, run this command:
export DEBUG=yes
Running this command increases the information recorded in the log file and can help you to identify problems.
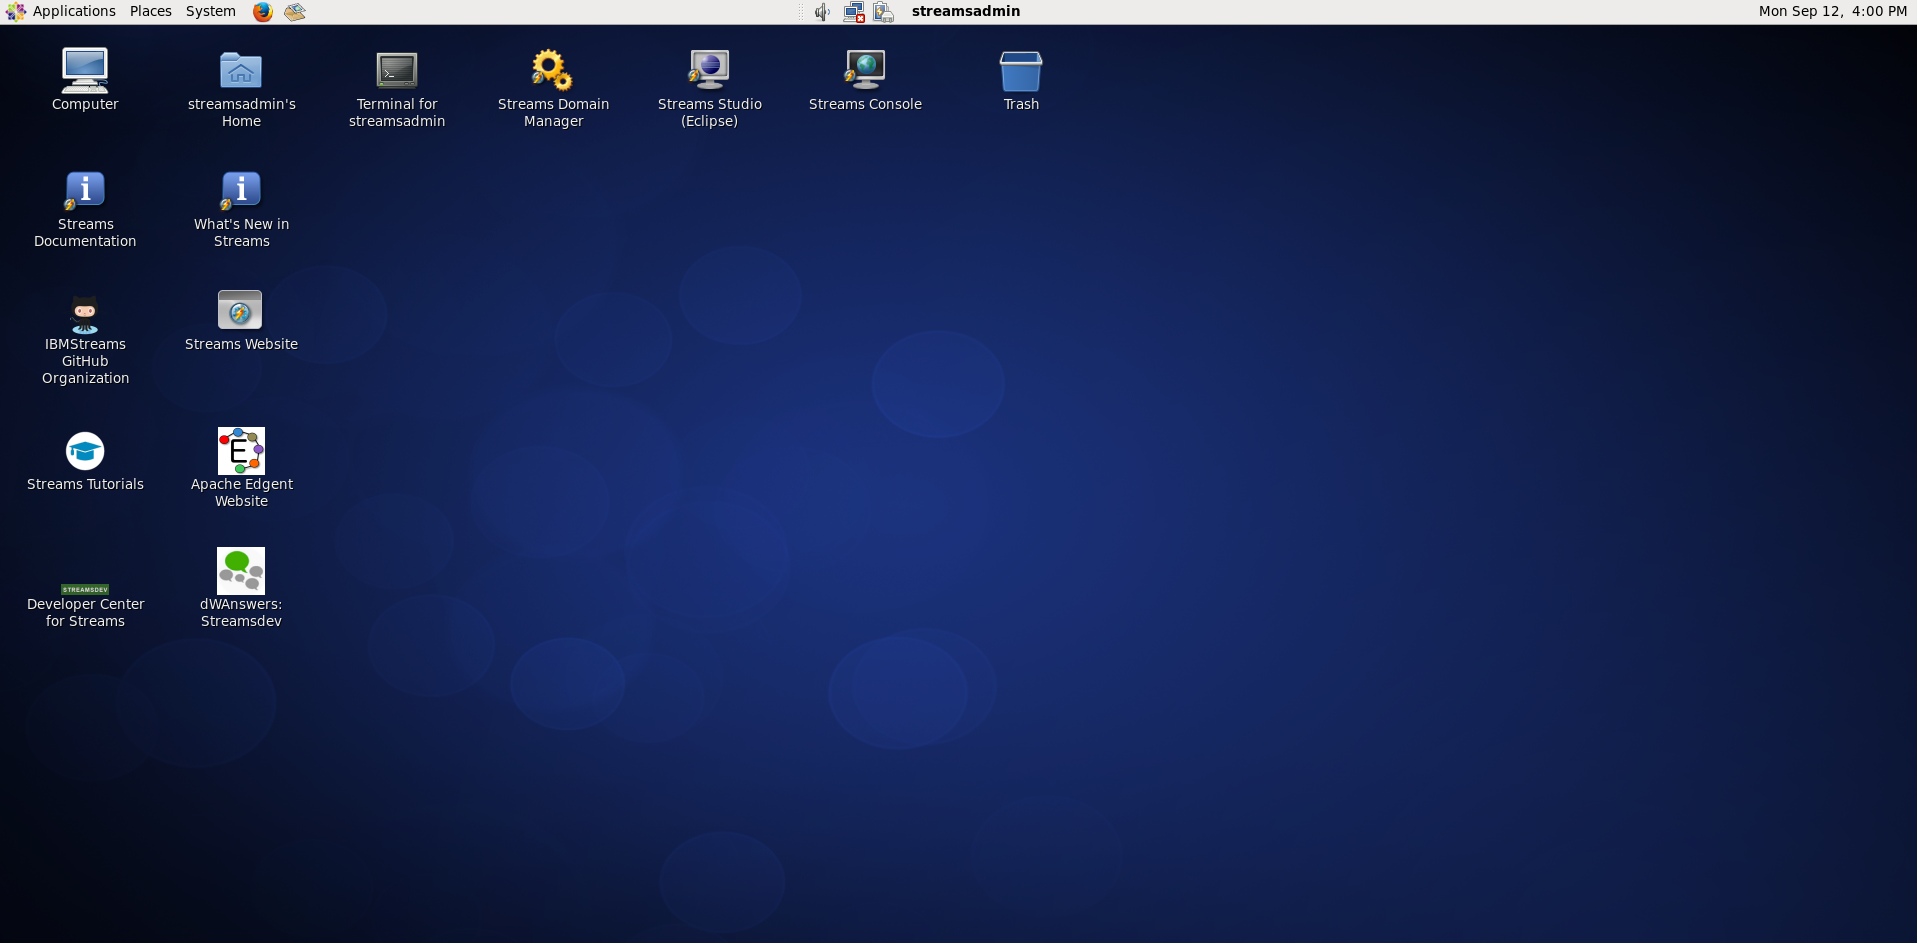
Check your results
If you successfully installed the tutorial files, your desktop should look something like this:
!
Your domain and instance are ready to run your applications.
Explore Streams
The IBM Streams platform consists of the following components:
|
Component |
Description |
|
Streams Studio |
An Eclipse-based Integrated Development Environment (IDE) for creating, compiling, running, visualizing, and debugging Streams applications. |
|
Streams Console |
A web-based graphical user interface for managing and monitoring the runtime environment and applications. This is where you can work with application graphs. |
|
Streams runtime |
A set of processes that work together to let you run stream processing applications on a group of host computers (“resources”) in a cluster. |
|
Streams Processing Language (SPL) |
A declarative and procedural language and framework for writing stream processing applications. |
|
Development and management interfaces |
APIs for creating building blocks (toolkits) and interfaces for interacting manually and programmatically with the runtime and applications. |
|
Toolkits |
Packages of building blocks for developing applications. They provide operators, functions, and types for many kinds of analytics and adapters for interfacing to external systems. |
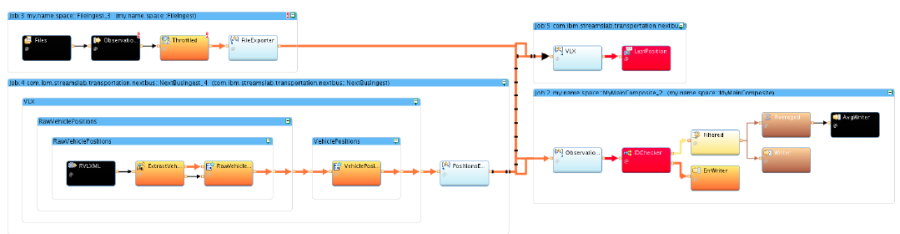
You can use an application graph to visualize the overall status of running applications and view information about application jobs, processing elements (PEs), operators, ports, and connections. You can also view or download log and trace data for components in the application graph. To select options for certain objects in the graph, such as a PE or operator output port, right-click the object.
The following image shows an IBM Streams application that's represented as a graph of connected operators.
To see the Studio interface:
- On the QSE desktop, click Applications > Favorites > Streams Studio.
- Accept the prepopulated workspace (/homes/streamsadmin/workspace) and click OK.
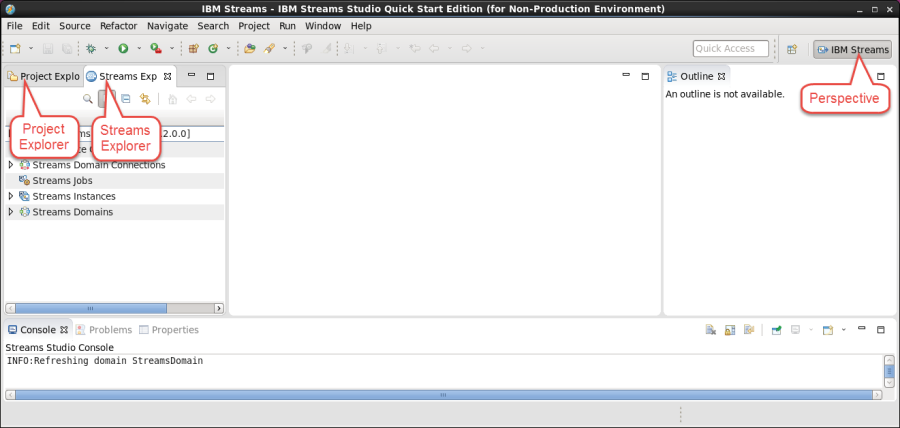
The Eclipse integrated development (IDE) environment is divided into multiple windows, which are called views.
Project Explorer: Shows project contents and details.
Streams Explorer: Shows domain and instance information, including any jobs that are running.
Editing pane: Empty when Studio is started. This is where you edit code or create application graphs.
Outline: When a Streams Processing Language (SPL) source file is open in the editor, this shows an outline of the code or the graph for quick navigation.
Console: Shows progress messages.
Properties: Shows property values for any object currently selected in another view. You can change these values here.
Problems: Logs problems or errors such as syntax errors, grouped by severity. This will not be used in this tutorial.
All of these views together make up a perspective in Eclipse. When you open Streams Studio, it opens to the IBM Streams perspective.