Adding toolkits to your application
Edit meAll SPL projects, including the ones you create, are called toolkits. The Streams platform includes many toolkits, each with useful operators and functions. For example, the operators used to connect to Kafka are in the Kafka toolkit.
Almost all Streams applications that you create will use one or more external toolkits.
This section shows you where to get toolkits and how to add a toolkit to your application.
Watch: Adding a toolkit to your application
This video summarizes the steps described in this article.
Find a toolkit
If you are looking for a toolkit for a specific purpose:
-
Check the list of toolkits that are available on the Streaming Analytics service
-
Search the Streams GitHub project for other toolkits that are not included in the Streams platform. From the project page, you can search for a toolkit by keyword.
Three steps to add a toolkit
To use a toolkit you add it to your application by doing the following tasks:
- (Optional) Download the toolkit and place it in your toolkit directory. You must complete this step if either of the following conditions apply:
- You want to use an updated version of one of the supported toolkits.
- The toolkit in question was downloaded from GitHub or is a third-party toolkit.
- Add an entry for that toolkit to your project’s
info.xmlfile. - Import the toolkit with a
usedirective in your SPL source code.
Adding a toolkit: Example
Your sample application uses input XML data that was saved in a file. You want to change it to use live data by by retrieving bus locations from the NextBus service.
Instead of reading from a file using a FileSource operator, you now need to use the HTTPGetXMLContent operator from the streamsx.inet toolkit to connect to NextBus.
The toolkit is included in Streams but is developed in the open on GitHub. So you can download the latest version from GitHub.
Step 1: Download and unpack the toolkit
a. Go to the streamsx.inet toolkit page
b. Download version 3.0 or greater of the toolkit: streamsx.inet.toolkit-3.0.0-el7-amd64
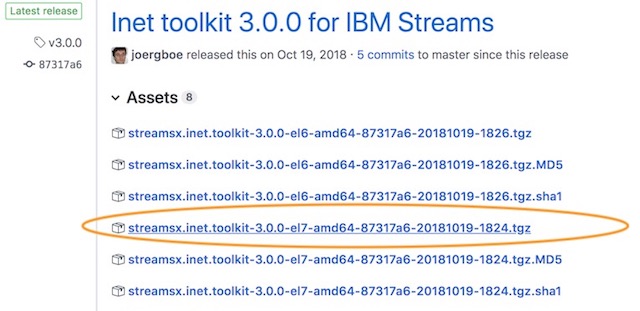
Note: If the toolkit you wish to use has multiple releases for different platforms, choose the el7-amd64 release. This is the release that is compatible with the Streaming Analytics service and IBM Cloud Pak for Data.
c. Unpack the toolkit and place the extracted files in the toolkits directory that you specified when you configured Atom. Recall that you specified this path in ide-ibmstreams package settings.
Recall that you specified this path in ide-ibmstreams package settings.
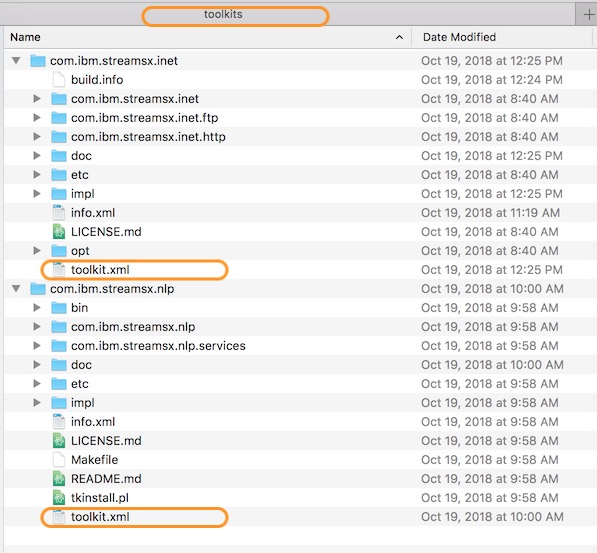
When you copy a toolkit to the toolkit directory, make sure that there is a toolkit.xml file present at the top level of the folder.
As shown in the following image, there are two toolkits, com.ibm.streamsx.inet and com.ibm.streamsx.nlp, and both have a toolkit.xml file.
Step 2: Add a dependency to the toolkit to your project:
d. Open the info.xml of your project:
If your project does not have an info.xml file, create one using the sample.
e. In the XML file, add a dependency to the new toolkit under the dependencies node:
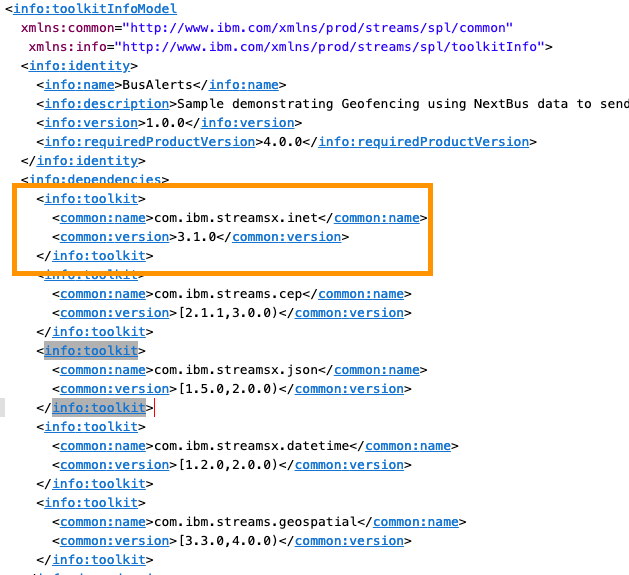
Here is a snippet for you to copy:
<info:toolkit>

  <common:name>com.ibm.streams.sometoolkit</common:name>

  <common:version>[min_ver,max_ver)</common:version>

</info:toolkit>
After you save the info.xml file, the streamsx.inet toolkit is ready for use in your application.
Step 3: Use the toolkit’s operators in your SPL source
In your SPL source, import an operator or function from the toolkit you just added with a use directive at the top of the file, right after the namespace declaration.
Adding use com.ibm.streamsx.sometoolkit.namespace::SomeOperator; imports SomeOperator from the toolkit.
You can then invoke the operator by entering the following code:
    stream<int32 myint> Result = SomeOperator(){

    }
For example, to use the HTTPGetXMLContent operator, add the line
use com.ibm.streamsx.inet.http::HTTPGetXMLContent; to the top of BusAlerts_CachedData.spl.
Now you can use the operator in your code. You’re going to replace NextBusData_FromFile stream with a HTTPGetXMLContext operator:
-
Comment out the
NextBusData_FromFilestream definition by selecting the operator’s definition and clicking Edit > Toggle Comment:**
-
Paste the following snippet in the editor:
stream<xml locationXMLDoc> RawData_Live = HTTPGetXMLContent() { param url : getUrl("vehicleLocations", $agency); period : 30.0; //poll every 30 seconds updateParameter: "t"; updateParameterFromContent: "/body/lastTime/@time"; } -
Change the
BusLocationStreamoperator to use theRawData_Livestream instead of theNextBusData_FromFilestream by changing this line :stream<rstring id,TimeMillis reportTime, float64 latitude, float64 longitude> ParsedDataStream = ParseNextBusData (NextBusData_FromFile )to:
  		stream<rstring id,TimeMillis reportTime, float64 latitude, float64 longitude>
ParsedDataStream  = ParseNextBusData(RawData_Live)
You’ve now replaced the operator that was reading from a file with one that connects directly to NextBus. Try it out by building and launching the application.
Because the data is live, you might need to wait a minute or two for the application to connect to NextBus before checking the Log Viewer.
Adding a toolkit: summary
-
Toolkits must be built, meaning that the top level of the toolkit must have a
toolkit.xmlfile.a. If you are downloading a toolkit from GitHub, a built version of the toolkit is available from the releases page of the GitHub project. If there are releases for different operating systems, choose the EL7-AMD64 release.
b. If no release exists, or if the downloaded release does not include a
toolkit.xmlfile, see the toolkit’s page for instructions on building the toolkit. -
Put the toolkit folder into the toolkit directory you created during the initial setup. Recall that you specified this path in the ide-ibmstreams package settings.
-
If the toolkit does not already have one, create a toolkit information file called info.xml for your project. Download a sample here.
-
Edit the
info.xmlfile to add a dependency to the toolkit you need:The following is an example of a project with 2 dependencies:
com.ibm.streamsx.sometoolkitandcom.ibm.streams.geospatial:<info:dependencies> <info:toolkit> <common:name>com.ibm.streamsx.sometoolkit</common:name> <common:version>[1.0.0,3.0.0)</common:version> </info:toolkit> <info:toolkit> <common:name>com.ibm.streams.geospatial</common:name> <common:version>[1.0.0,3.0.0)</common:version> </info:toolkit> </info:dependencies> -
Add a use directive in your SPL code to import operators from the toolkit:
-
Adding
use com.ibm.streamsx.sometoolkit.namespace::SomeOperator;will importSomeOperatorfrom the toolkit, Then you can invoke the operator:stream<int32 myint> Result = SomeOperator(){ }
-