Build and run an application from Atom
Edit meWith the cloud-based development using Atom, compilation and execution are all done in the cloud. From Atom, you can compile an SPL application by using the Build or Build and submit job actions:
If you choose Build, the application is compiled and the resulting .sab (Streams Application Bundle) executable file is saved to the output folder of your project. If you choose Build and submit job, the application is compiled and executed in the cloud.
Here is an example.
About the sample application
The BusAlerts application displays alerts and advertisements inside the city’s public transit vehicles as they move through points of interest.
For example, if there is a security incident an alert about the incident is displayed inside the bus as the bus approaches the region. Local businesses can also purchase advertising to be displayed when the bus is near the business. To follow along, download the sample application if you haven’t already.
Build the application
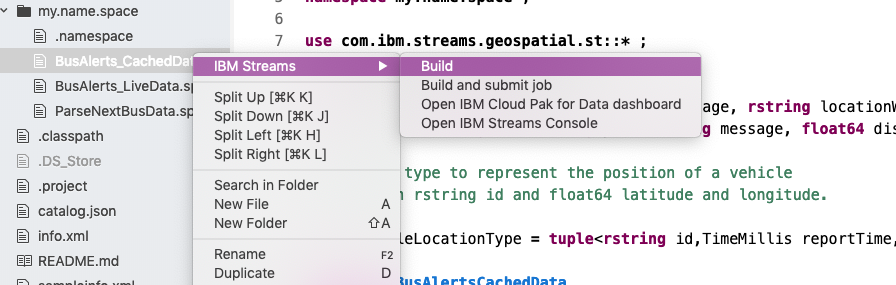
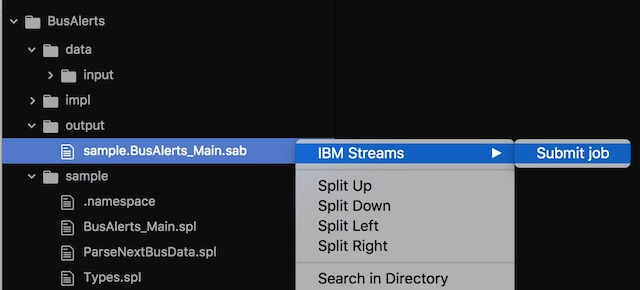
In the Project pane, select the SPL file containing the composite you want to run. In our example, select BusAlerts > my.name.space > BusAlerts_CachedData.spl.
Right-click, and select IBM Streams > Build and submit job.
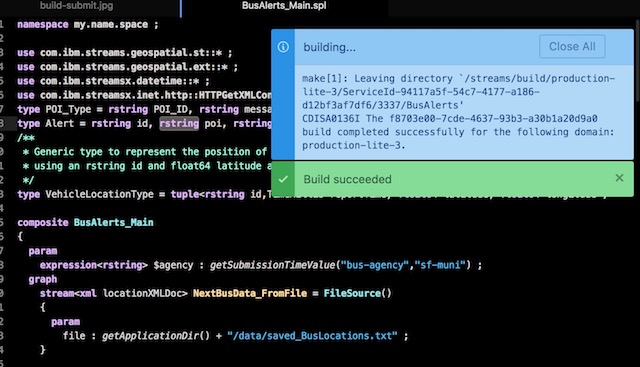
Various alerts that describe the compilation progress are displayed:
View compile messages and errors
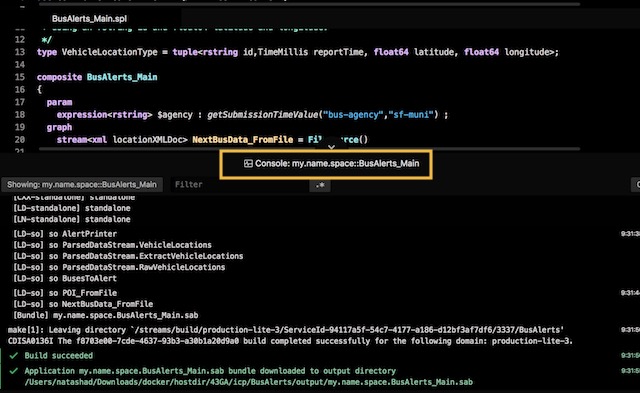
The Atom Console pane contains all information and error messages rece1ived from the Streaming Analytics service. Check this pane to view details of any errors that might occur during compilation.
Click View > Toggle Console and the console pane appears:
If an error occurs, see the Troubleshooting section for help to resolve errors.
Run the application
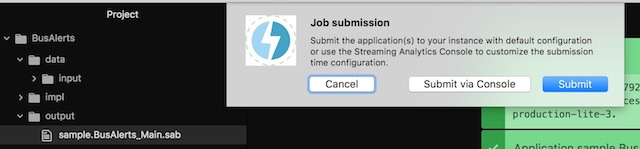
If you compiled the application by using the Build and submit job option, you will receive an alert after compilation completes successfully. From the alert, you can submit the job.
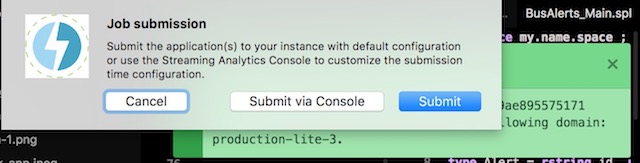
Submitting the job means launching the application on the Streams instance in the cloud.
Click Submit and the application is be launched for you. You can also use the Submit via Console option if you need to configure your application before submitting. The Submit via Console option is discussed later on.
Monitoring jobs
Streams applications can be monitored using the Job Graph or the Streams Console. The tool you'll use depends on your development environment and/or preference. The Job Graph is only available in Cloud Pak for Data, but the Streams Console is included with all versions of Streams.
Using the Job Graph
The Job Graph is available in the CPD web interface
For the Job Graph in CPD, see this section.
Using the Streams Console
If you are not using Streams in CPD or are looking for a more advanced alternative to the Job Graph, you can monitor the health of your Streams application and cluster using the Streams Console.
View the output of the BusAlerts application
Whenever a bus is near a POI, the BusAlerts application just prints the alert that should be sent to the bus.
To view or download the logs for the BusAlerts application, see the instructions for the Job Graph or Streams Console.
You should see output like this:
Bus N is near Mission Dolores Park, message = Security incident near Mission Dolores Park, road and sidewalk closures in effect.
Bus 30  is near AT&T Park, message = If the Giants win, show your game ticket to get a discount on a GetThere taxi after the game. Goo giants!
Each line indicates the bus route, the business or area of interest, and the message that would be sent. For example, the first message would be to the N bus, stating that there is a security incident near Mission Dolores Park.
Launching an application with parameters
If you have an application and would like to specify a parameter at runtime, you cannot submit the application from Atom after compilation.
Submitting such an application from Atom without the runtime parameter results in the following message or prompt:
CDISR1146E The following job submission parameter is required, but it is missing: sample::BusAlerts_Main.bus-agency.
The message means that you must specify a value for a parameter. To specify application parameters, use the Streams Console to submit the application.
Submit an application from Streams Console
The general steps to submit your application from Streams console are described in this video:
As shown in the video, the steps are as follows:
- Create an executable file by using the Build option rather than the Build and submit job option. This option compiles the application and places an executable file called
myapp.sabfile in your project’s output directory. - Open the Streams Console, and upload the
myapp.sabfile. - Set any needed parameters.
In this case, your application has a parameter called $agency, which is set in the code.

Use this parameter to change the application to monitor buses in a different regions.
The default value is sf-muni, so by default our application monitors buses in the San Francisco Municipality. Your goal is to set the $agency parameter to ttc, for Toronto Transit Commission. Using this value will change the application to monitor buses in Toronto instead of San Francisco.
Use Build to create an executable
Right-click the SPL file and click Build.
This option compiles the application and saves the executable file to the output folder of your project.
If the build is successful, you will see a new folder within the project that contains the executable file.

To launch the application, you can right click the .sab file from the output folder and click Submit job.
When you are prompted to submit the application, choose Submit via Console.
This option opens the Streams Console in your browser.
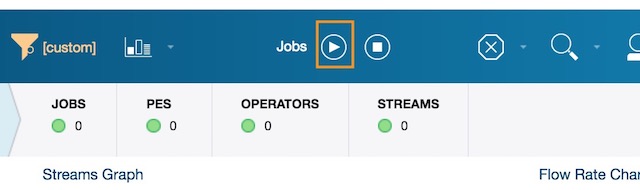
Submit a job from Streams console
From the console, click the Submit job to submit a job.
In the Submit Job window, click Browse. Select the .sab file from the output folder of your project.
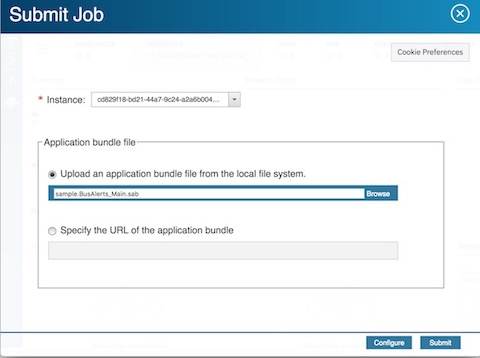
Tip: The path to the file is printed in the Atom Console, so you can copy and paste it.

Click Submit. The application parameters are displayed.
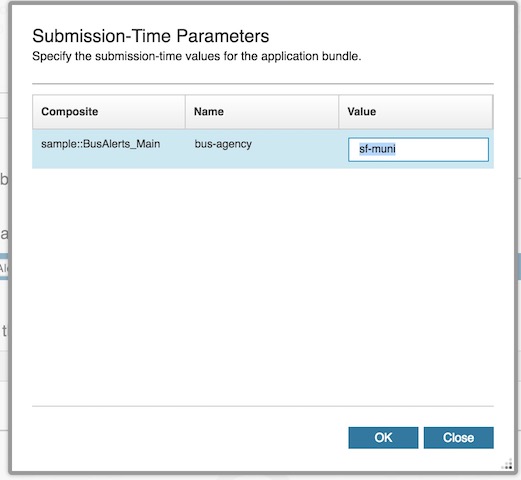
Note: because the bus-agency parameter has a default value, sf-muni we were able to submit the application the first time. When you use the Build and submit option and then submit directly from Atom, the default values for any parameters are used, if there are no default values for some parameters the submission will fail.
Setting parameters summary
-
To set a parameter value when submitting an application, you must use the Streams Console to submit the application.
-
To add a parameter to your application that will be set when you submit the job, use the
getSubmissionTimeValuefunction to add a named parameter.
Stop a running application
Important: If you are using the Streaming Analytics service in IBM cloud, avoid leaving an application running unnecessarily to avoid exceeding the free computation limit and incurring additional charges
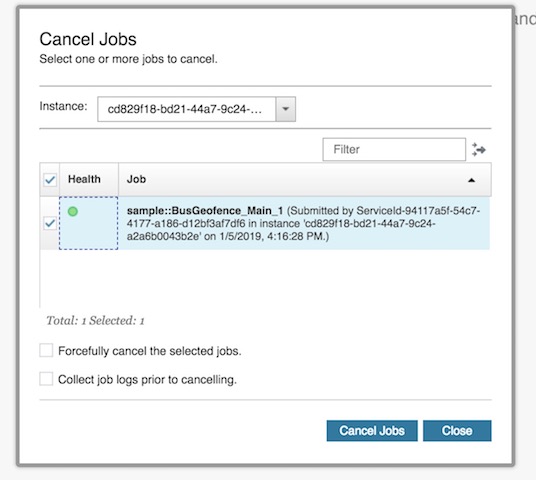
When you are finished with an application, stop it by clicking the Cancel button from anywhere in the Streams console.

Select the jobs to be canceled and click Cancel Jobs.
Next steps
The next section discusses adding functionality to your application by downloading and using toolkits.